The ME-Ticket team is committed to ensuring your event creation experience is seamless and successful. As a result, creating events on ME-Ticket has become even easier. Now, you only need to go through 4 steps instead of 7. This greatly simplifies the process and will make your experience of using ME-Ticket more comfortable. Let's explore how everything will work.
What changed?
Now, in the Event Сonstructor in the organizer’s personal account, you will have access to only 4 steps:
- Event Details;
- Ticket Info;
- Payment Info;
- Event Preview.
Although there are fewer steps, this did not affect the flexibility of our designer. Each organizer will still have access to the entire set of tools available before the update. Next, we will tell you about everything in more detail.


Step1: Event Details
At this step, you need to provide general information about your event. Please take care to double-check your entries to avoid errors and pass moderation the first time. In Step 1 you need to indicate:
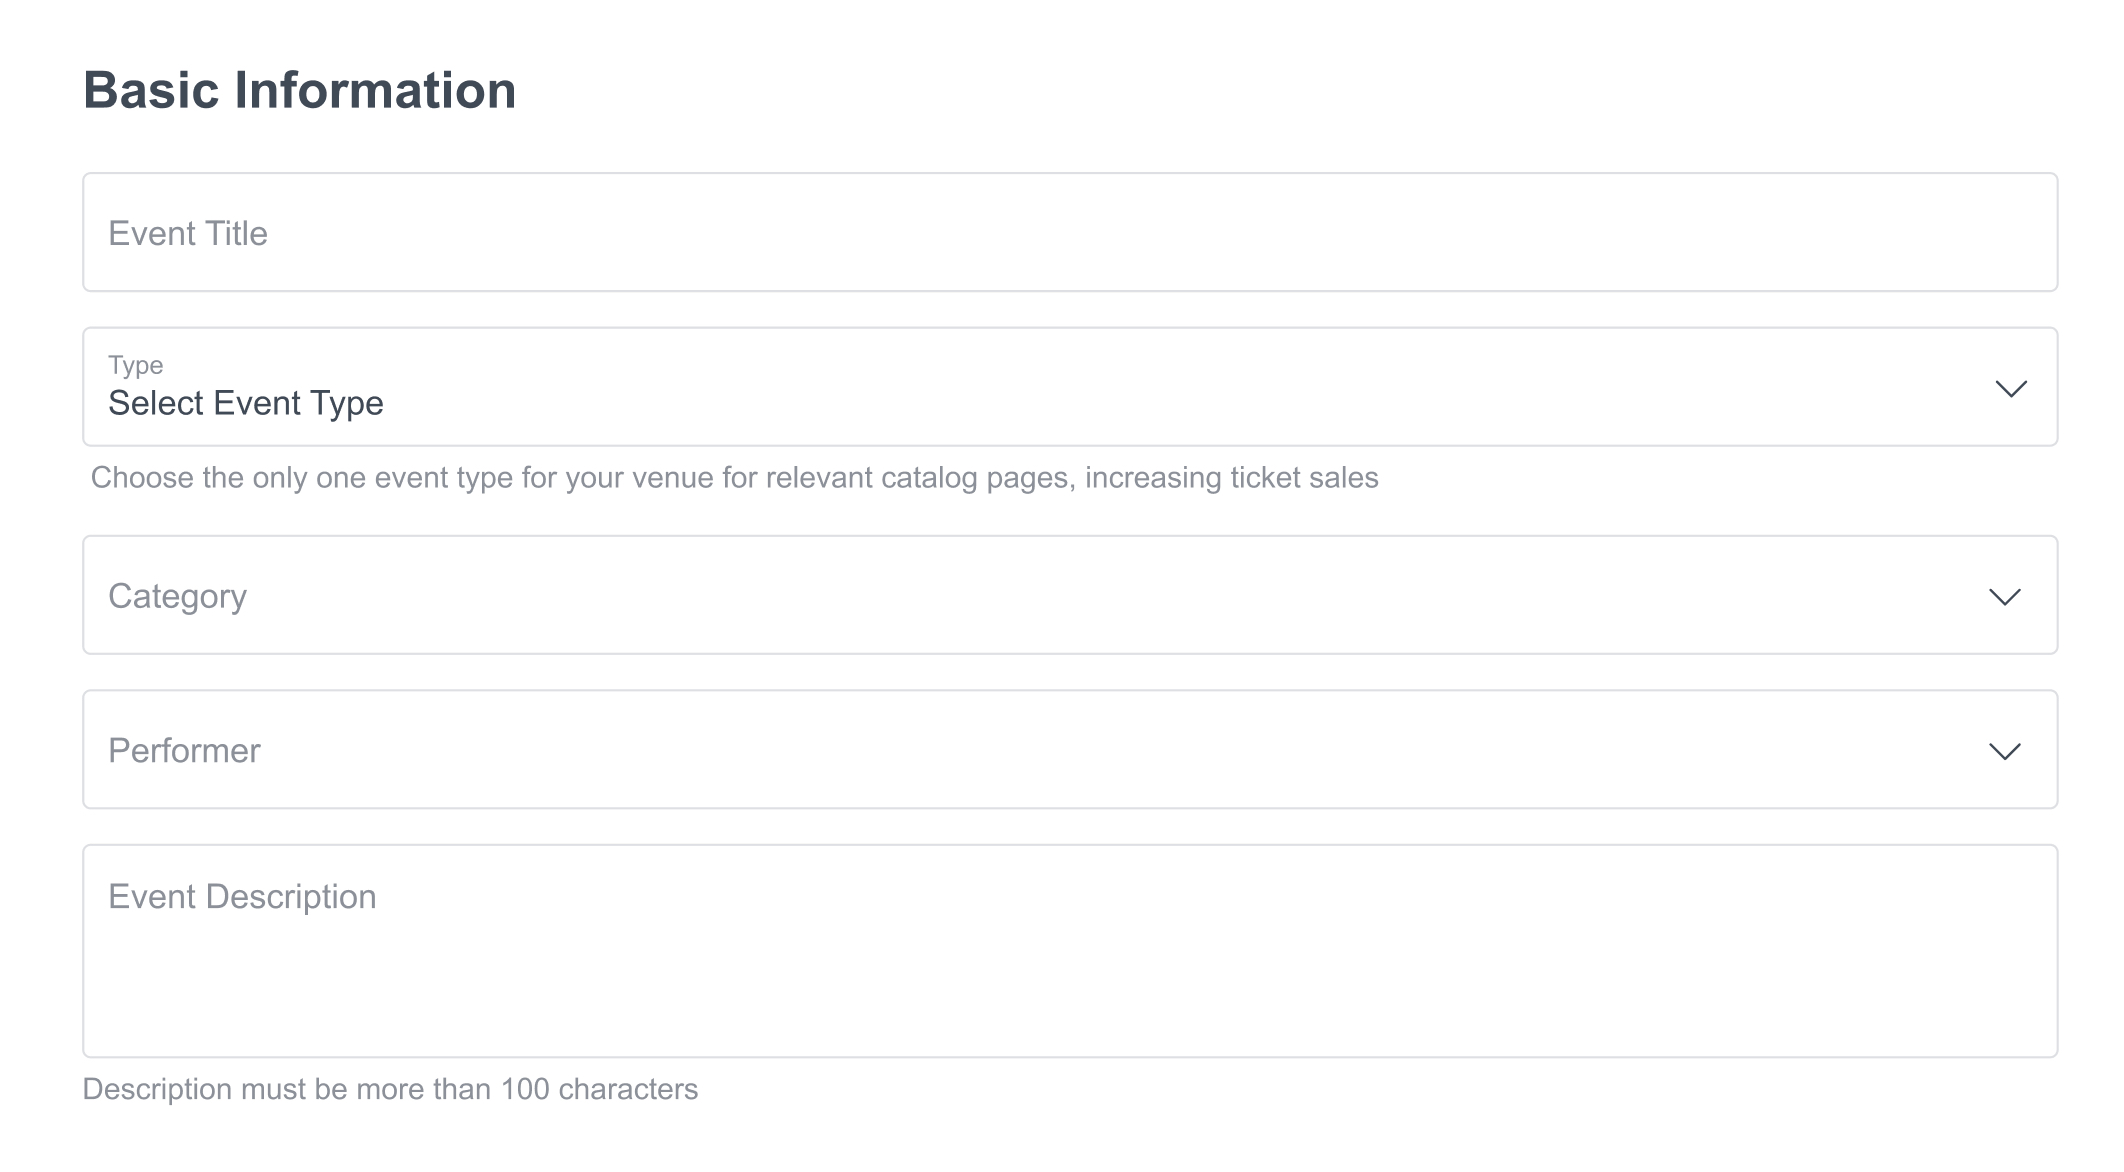

1. General information about the event. Here you can specify the Name of the event, Type and Category of the event, Performer (if any). You'll also need to provide a description of the event, which must be at least 100 characters long.
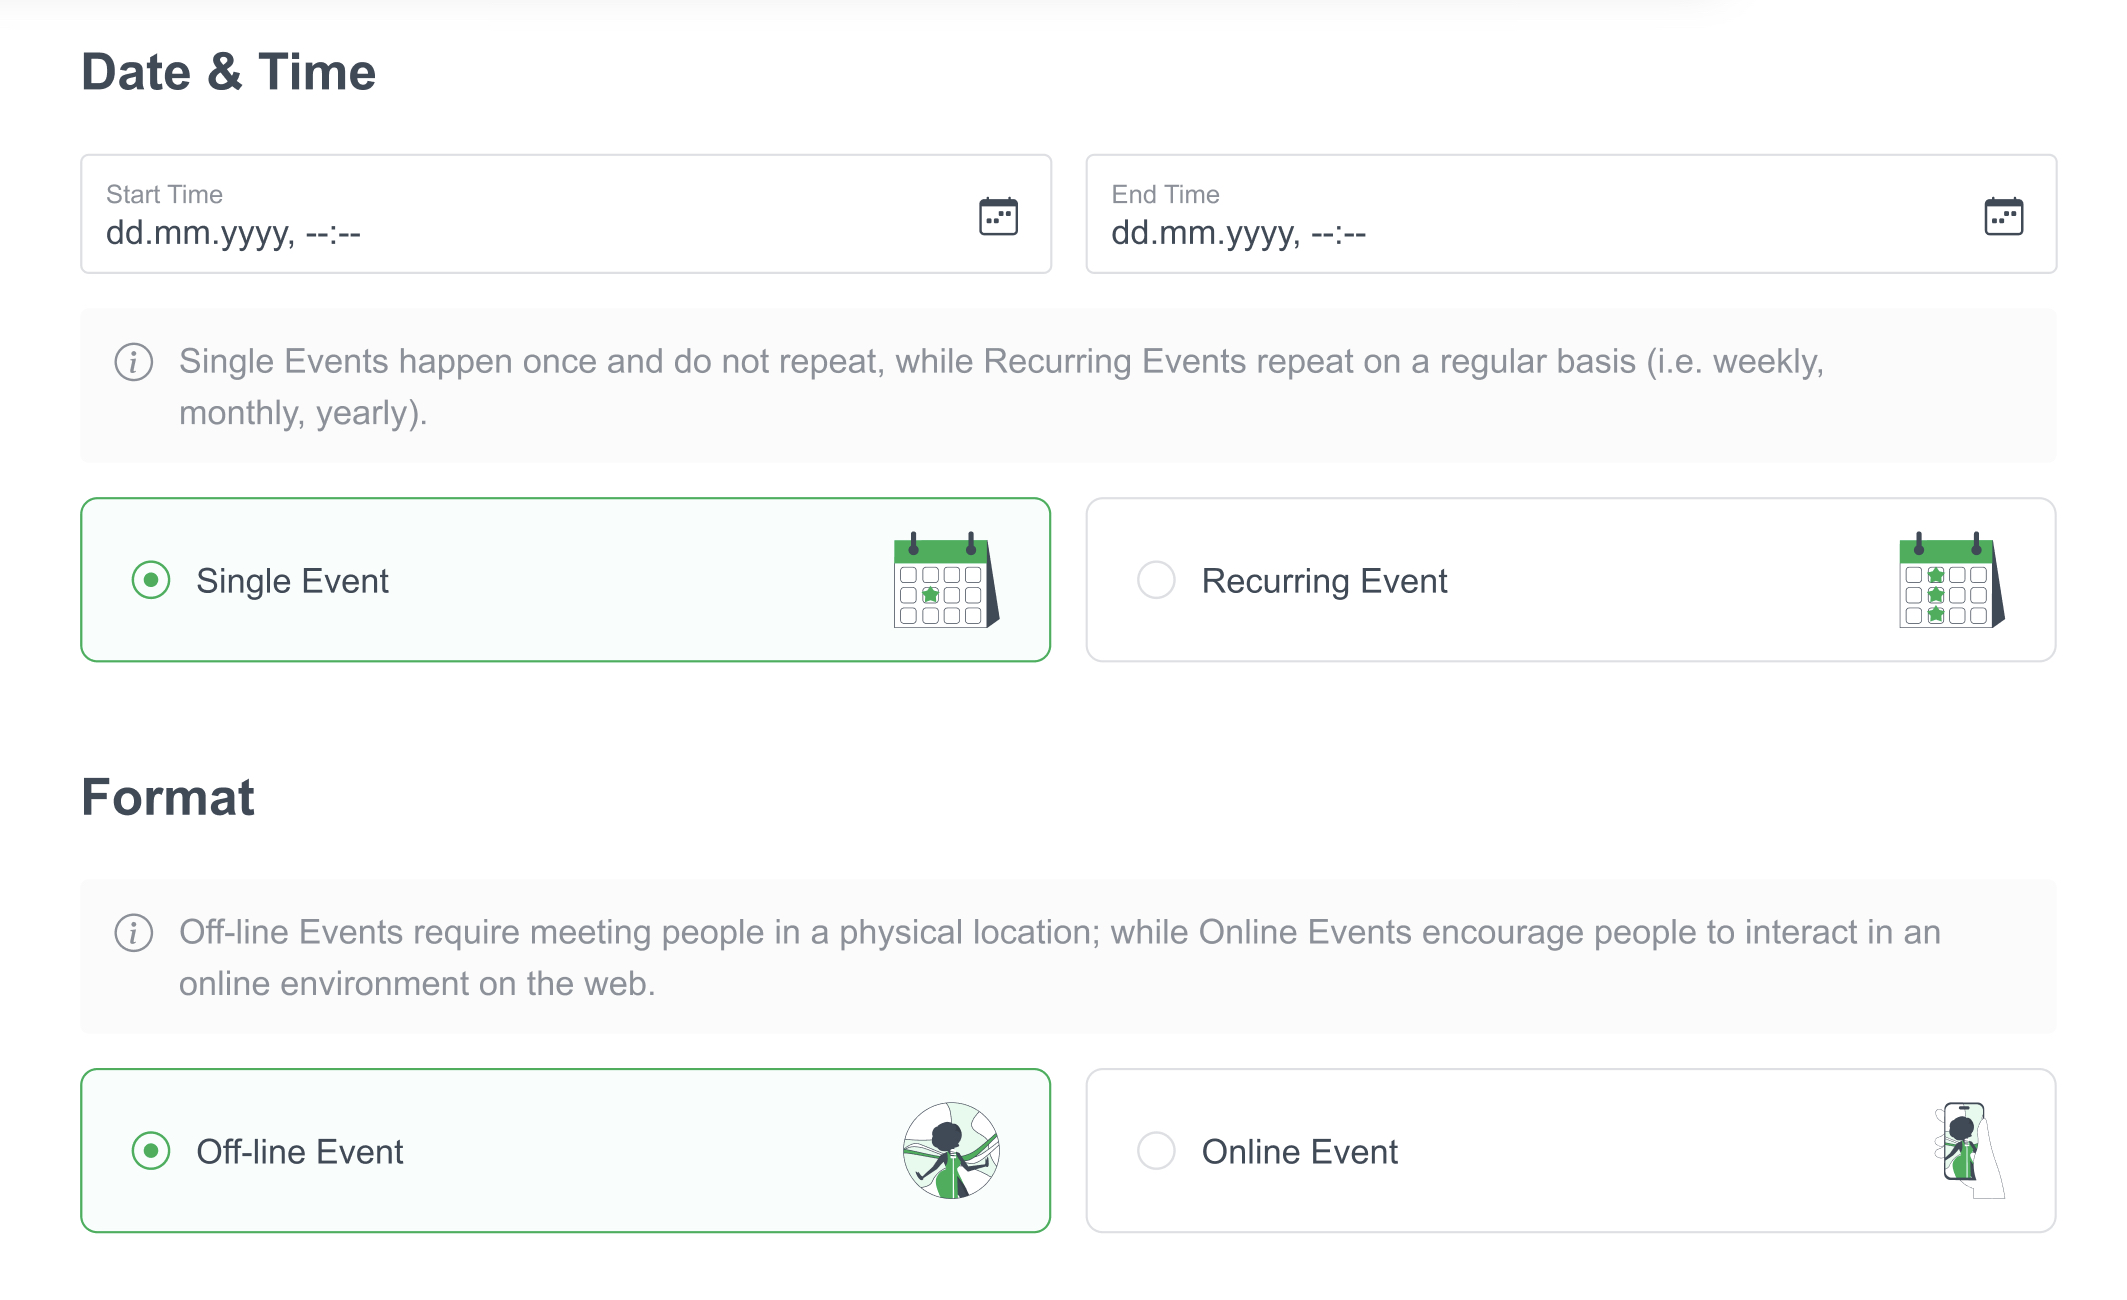
2. Date and time. In this section, indicate the start and end date and time of the event. You can also choose the “One-time event” or “Recurring event” options. When you select the second option, you will be able to select repeat options for your event from a pop-up list.
3. Format of the event. Indicate whether your event will be held "Online" or "Offline."
4. Event location / Event platform. If you have chosen the “Offline” format, specify the exact location of your event. If your place is not on the proposed list, you can set your own. For "Online" events, insert an invitation link and provide platform usage instructions.
5. Media events. In this section, select Poster, Gallery Images, and Event Banner.
Once you have filled out all the information, you can move on to the next step.
Step 2: Ticket Info
In Step 2 you need to indicate:
-
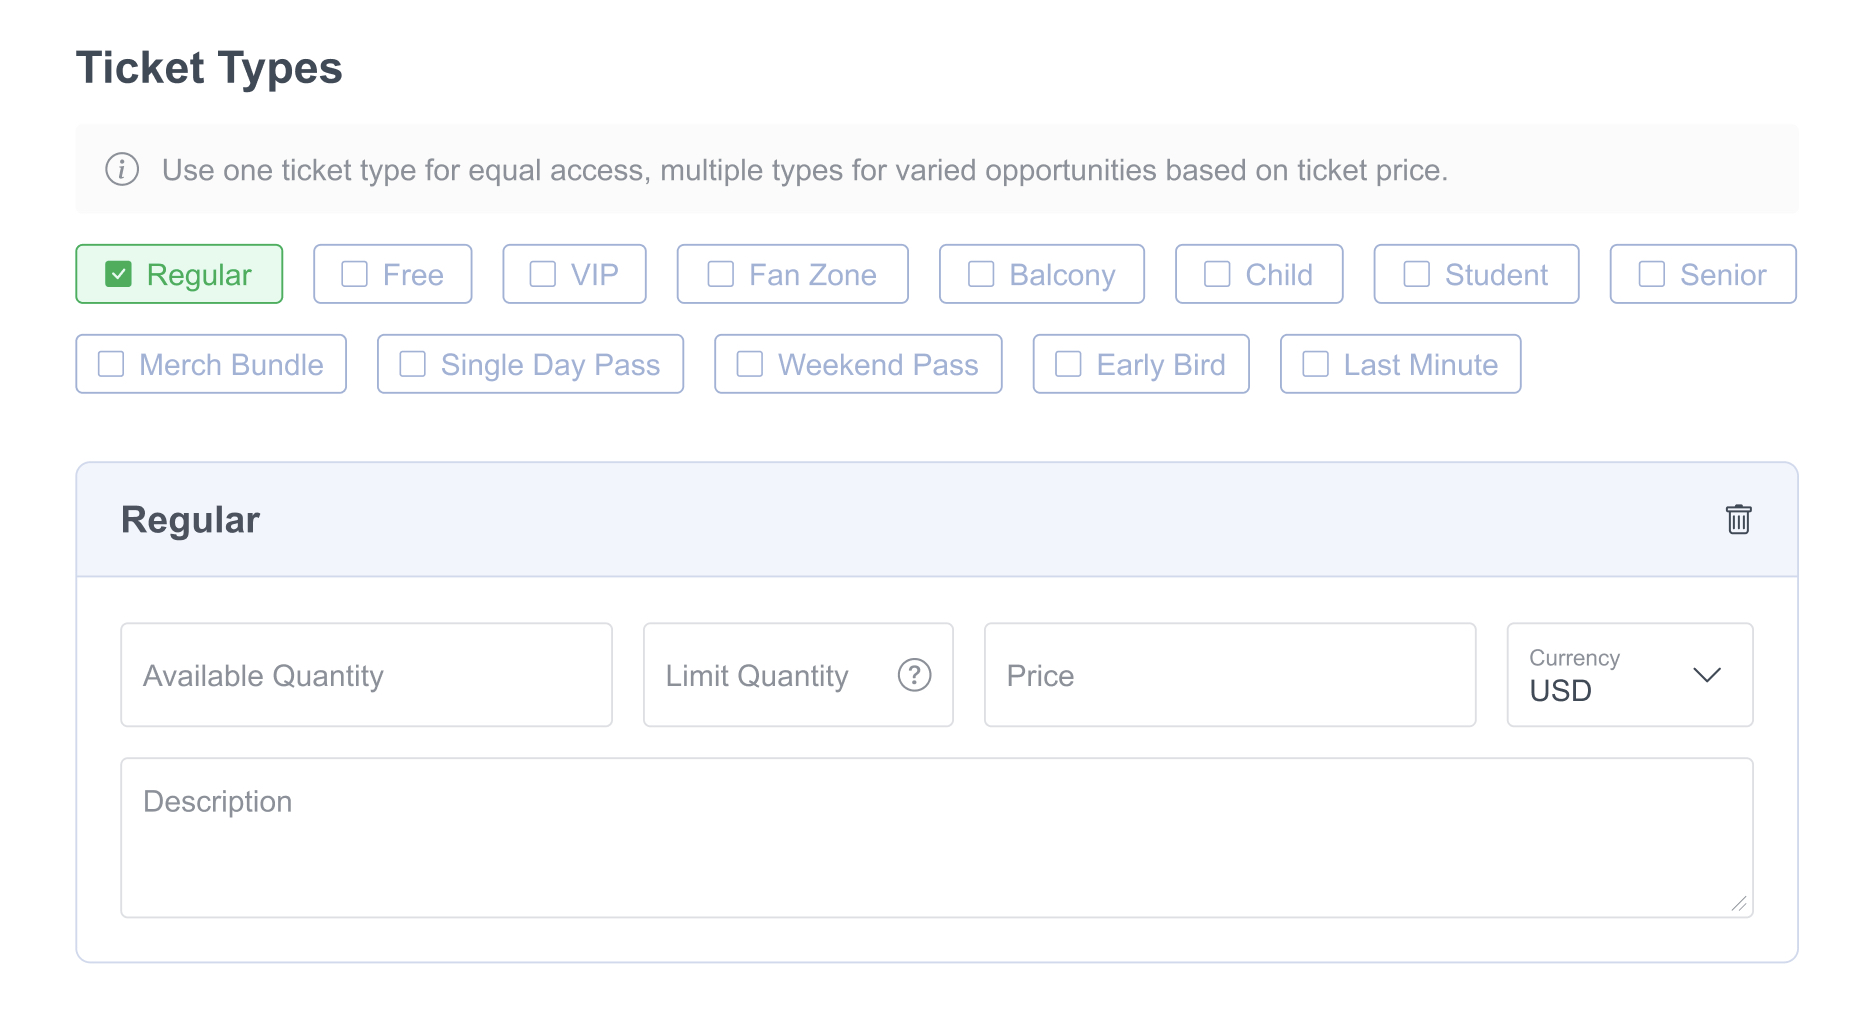
Types of tickets. In this section, you can select the types of tickets you need, indicate the available quantity, set limits on ticket purchases, set prices, and select the payment currency. Additionally, if your ticket includes various additional services, you can specify them in the “Description” field.
-
Ticket return policy. Check to see if it is possible to return your tickets. And if you indicated "yes", provide contact information for visitors to inquire about returns.
After filling out all the required fields, you can proceed to the next step.
Step 3: Payment Info
As part of this step, you can address all matters concerning ticket payments. If you selected only the free ticket type in the previous step, this step becomes optional.

In Step 3 you need to indicate:
-
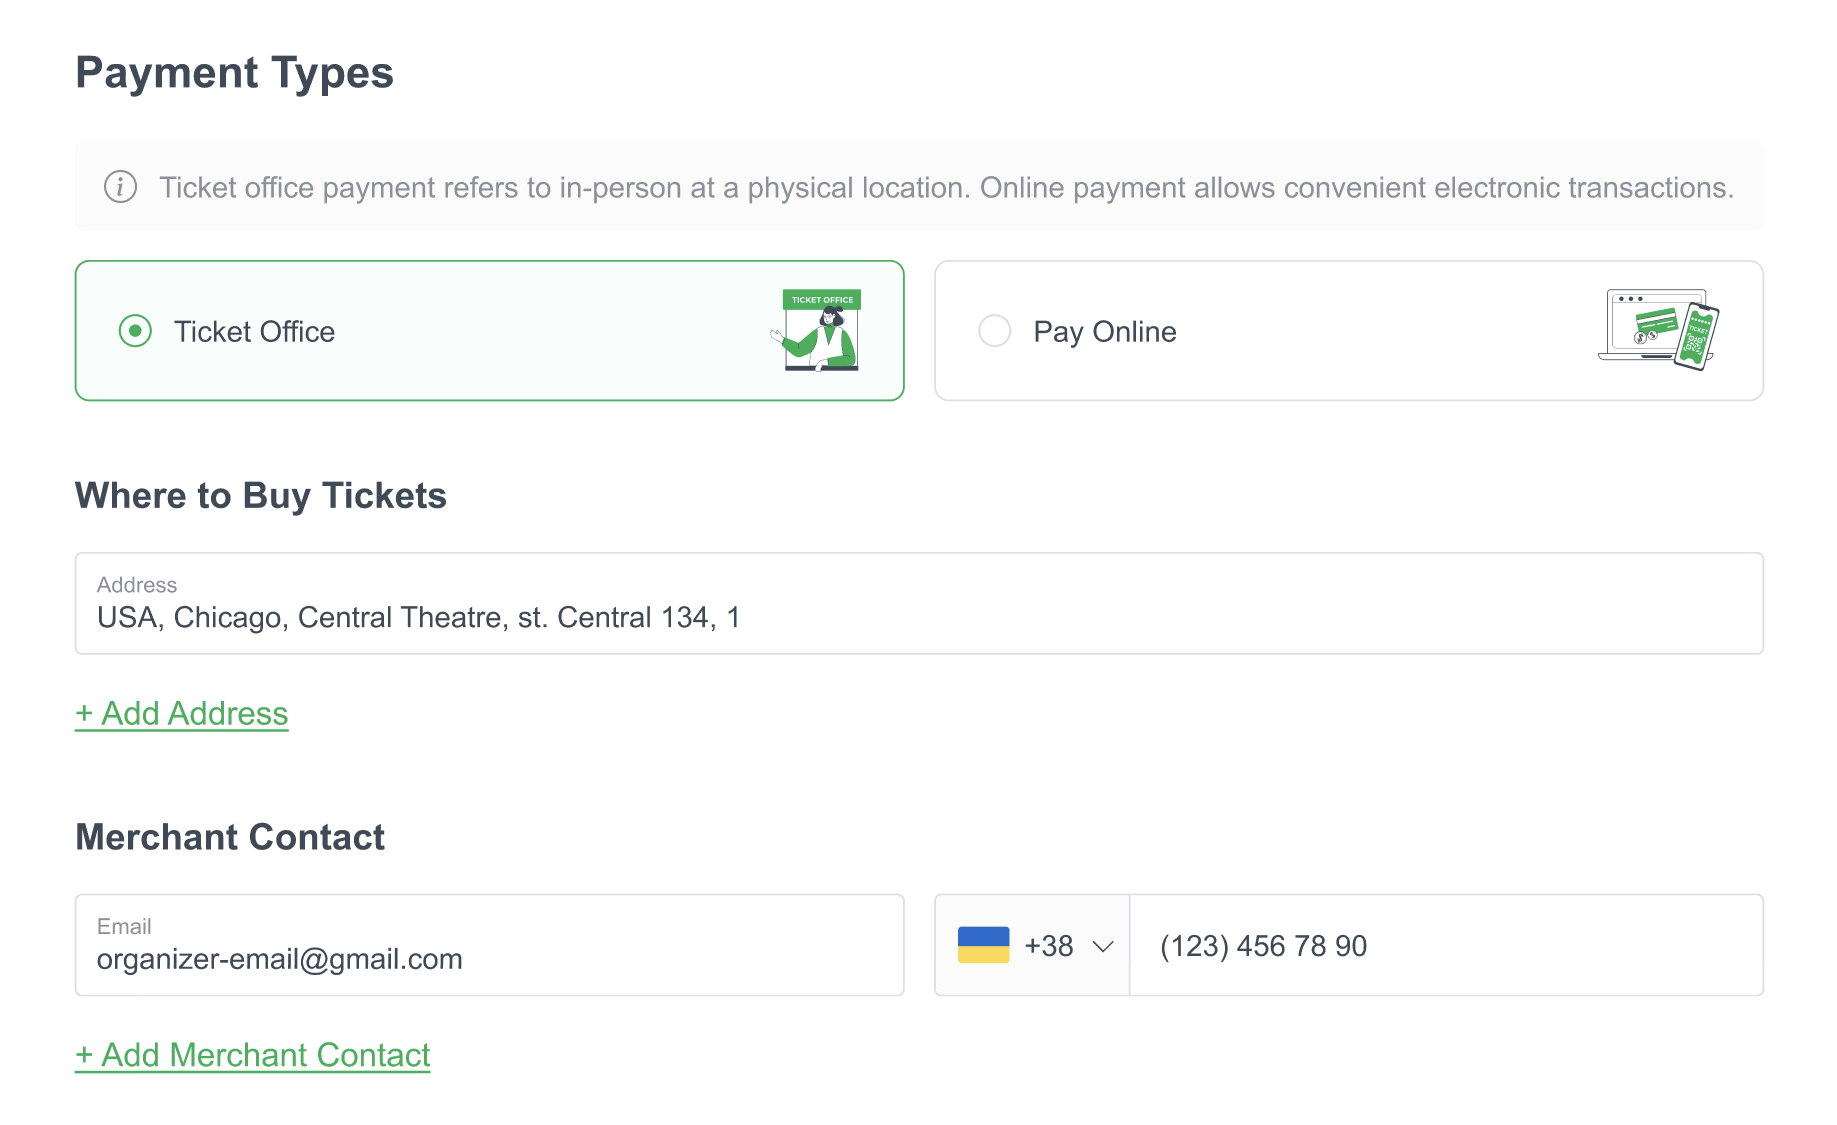
Payment type. Choose how you would like to sell your tickets. “Ticket Office” - if you want to sell tickets offline or “Online” for online sales.
-
Details of payment. If you chose the “Ticket Office” option, you can indicate the address of the ticket sales point, as well as your contact email and phone number. If you chose the “Online” option, please indicate the payment receipt format: Stripe or Bank transaction.
Once you have provided all the necessary payment information, you will be taken to the next step.
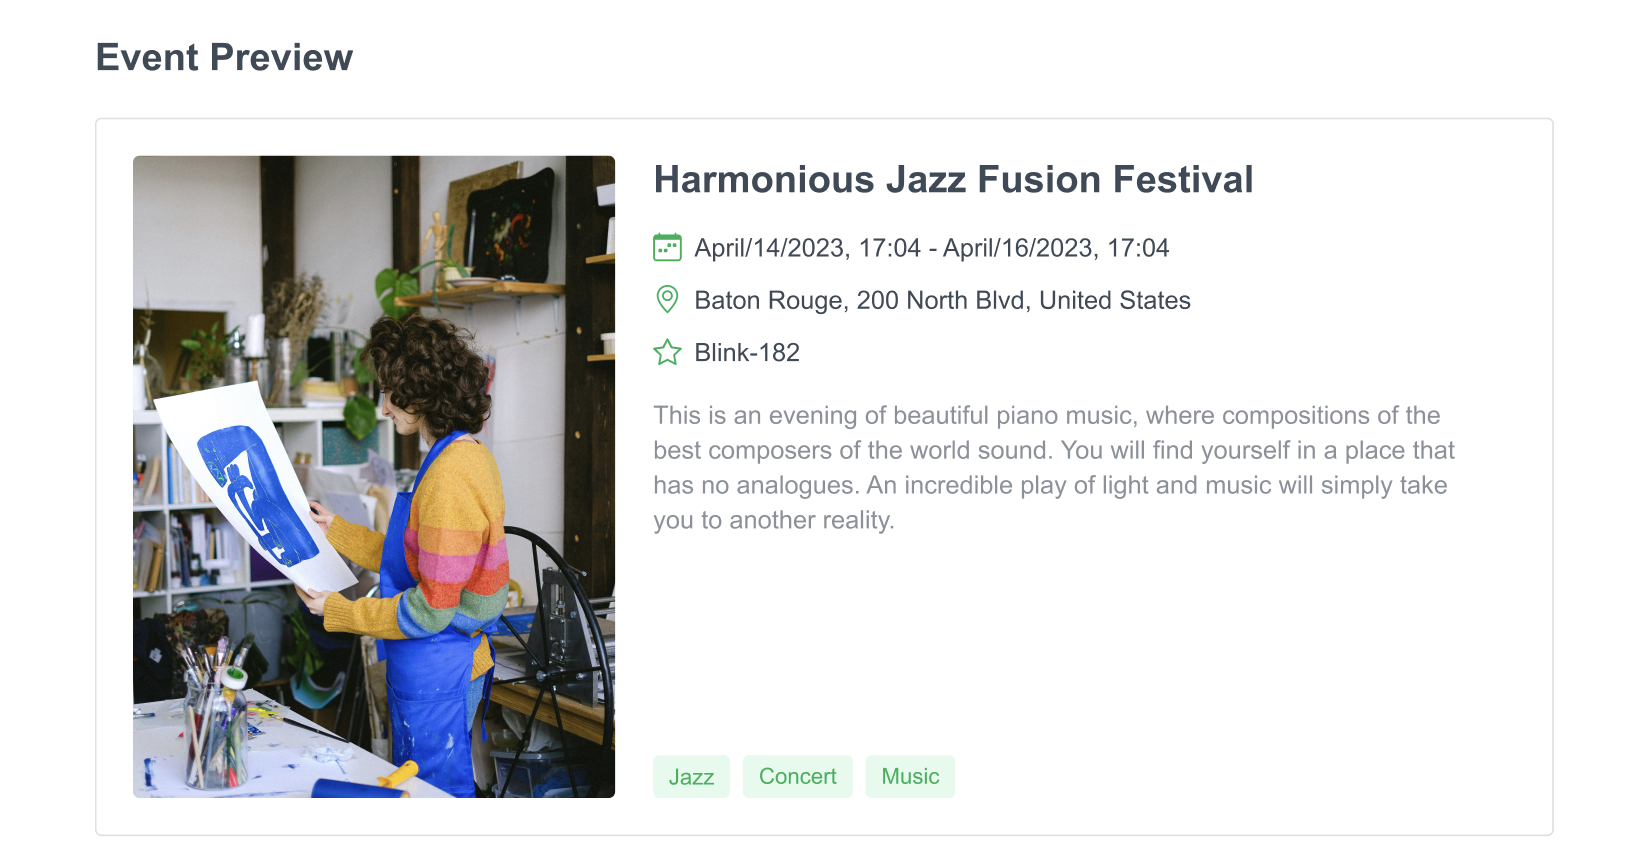
Step 4: Event Preview
At this Step, you can preview how your event will look on the website, and double-check the previously entered information. If everything is correct, feel free to click on the “Post to catalog” button and await moderation for your event to be published on the site.
In this article, we've guided you through all the changes made to the Event Сonstructor. We are always working to improve your user experience to make creating events and selling tickets as easy as possible.

