So you’ve got a great idea for an event — maybe it’s a workshop, concert, community gathering, or private party. Now what? How do you actually get people to find it, get excited, and buy tickets?
Good news: with ME-Ticket, launching your first event is easier than ordering coffee online. Whether you’re a seasoned pro or brand new to event organizing, this guide will walk you through each step to go from idea to live ticket sales — no tech skills needed.

Why ME-Ticket is Perfect for First-Time Organizers
If this is your first rodeo, you need a platform that makes things simple, safe, and stress-free. That’s where ME-Ticket shines:
- User-friendly interface
- Fast event setup
- Built-in payment processing
- Easy mobile access for you and your guests
No complicated software. No hidden fees. Just your event, your audience, and full control.
Step-by-Step Guide to Creating Your Event
Let’s dive right in! Here’s exactly how to set up your first event on ME-Ticket from scratch.
Create Your ME-Ticket Account
First things first: head over to me-ticket.com and click on “Sign Up”.
All you need is:
- A valid email address
- A password
- Basic contact info
Once you confirm your email, you’re ready to go.
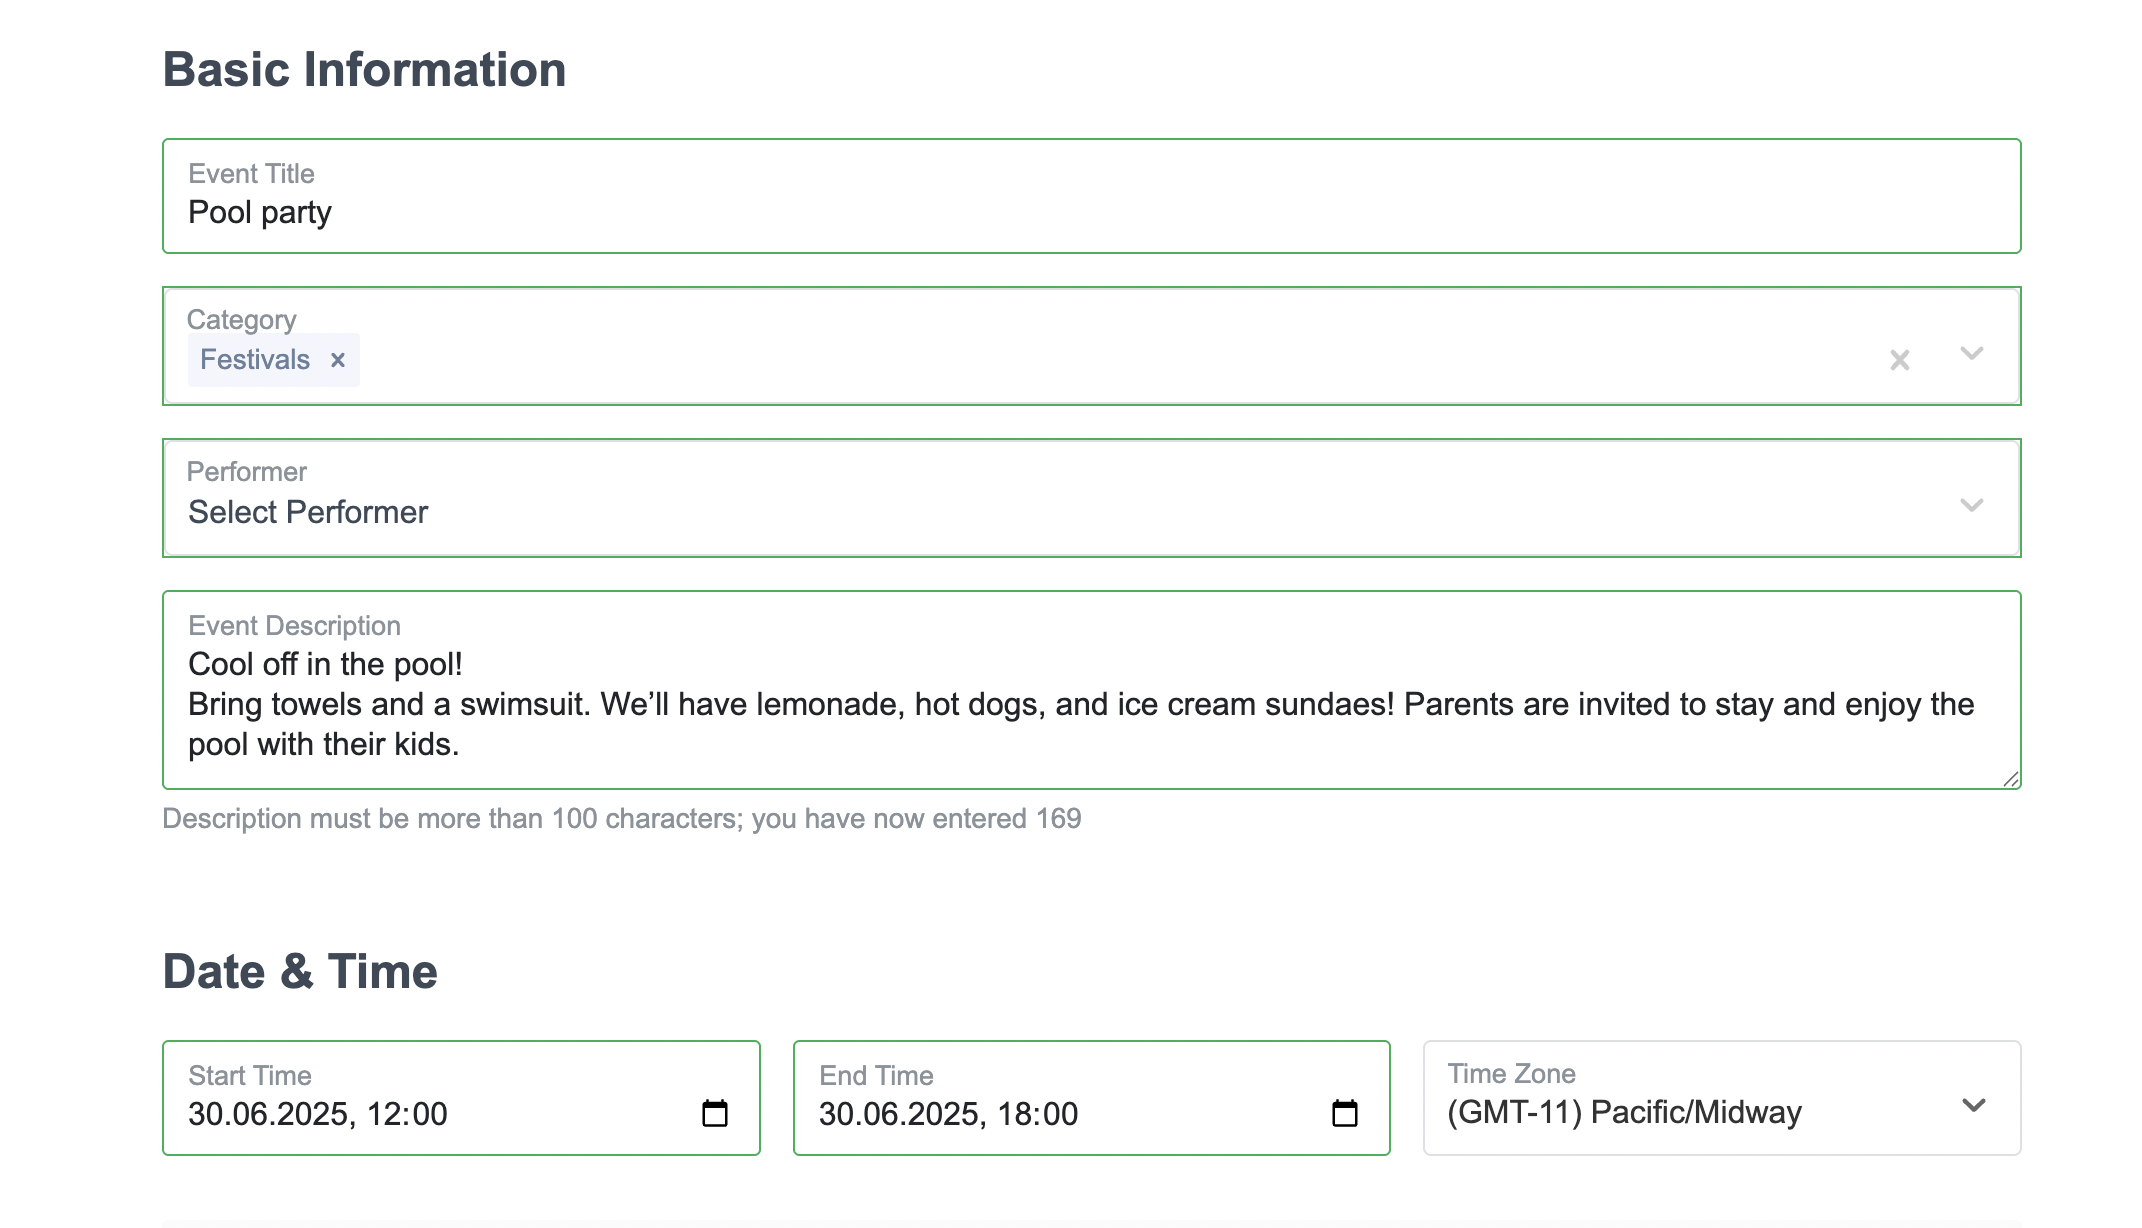
Step 1: Basic Event Info
Start by clicking "Create New Event." This is where you’ll set up the foundation.
- Event Title – Keep it concise and SEO-friendly (e.g., Jazz Night Rome 2025).
- Select Category – Pick from categories like Music, Art, Business, etc.
- Select Performer – Link an artist or speaker from your profile. No performer yet? Add one from the same page.
- Event Description – Must be 100+ characters. Explain the event’s purpose, theme, or highlights.
- Date & Time – Choose start and end.
- Time Zone – Auto-suggests based on venue location.
When setting up your event, start by choosing its frequency. You can create a Single Event for one-time occasions or set it as a Recurring Event if it happens on a regular schedule—whether daily, weekly, or monthly. This helps attendees know what to expect and ensures your event appears consistently if it repeats.
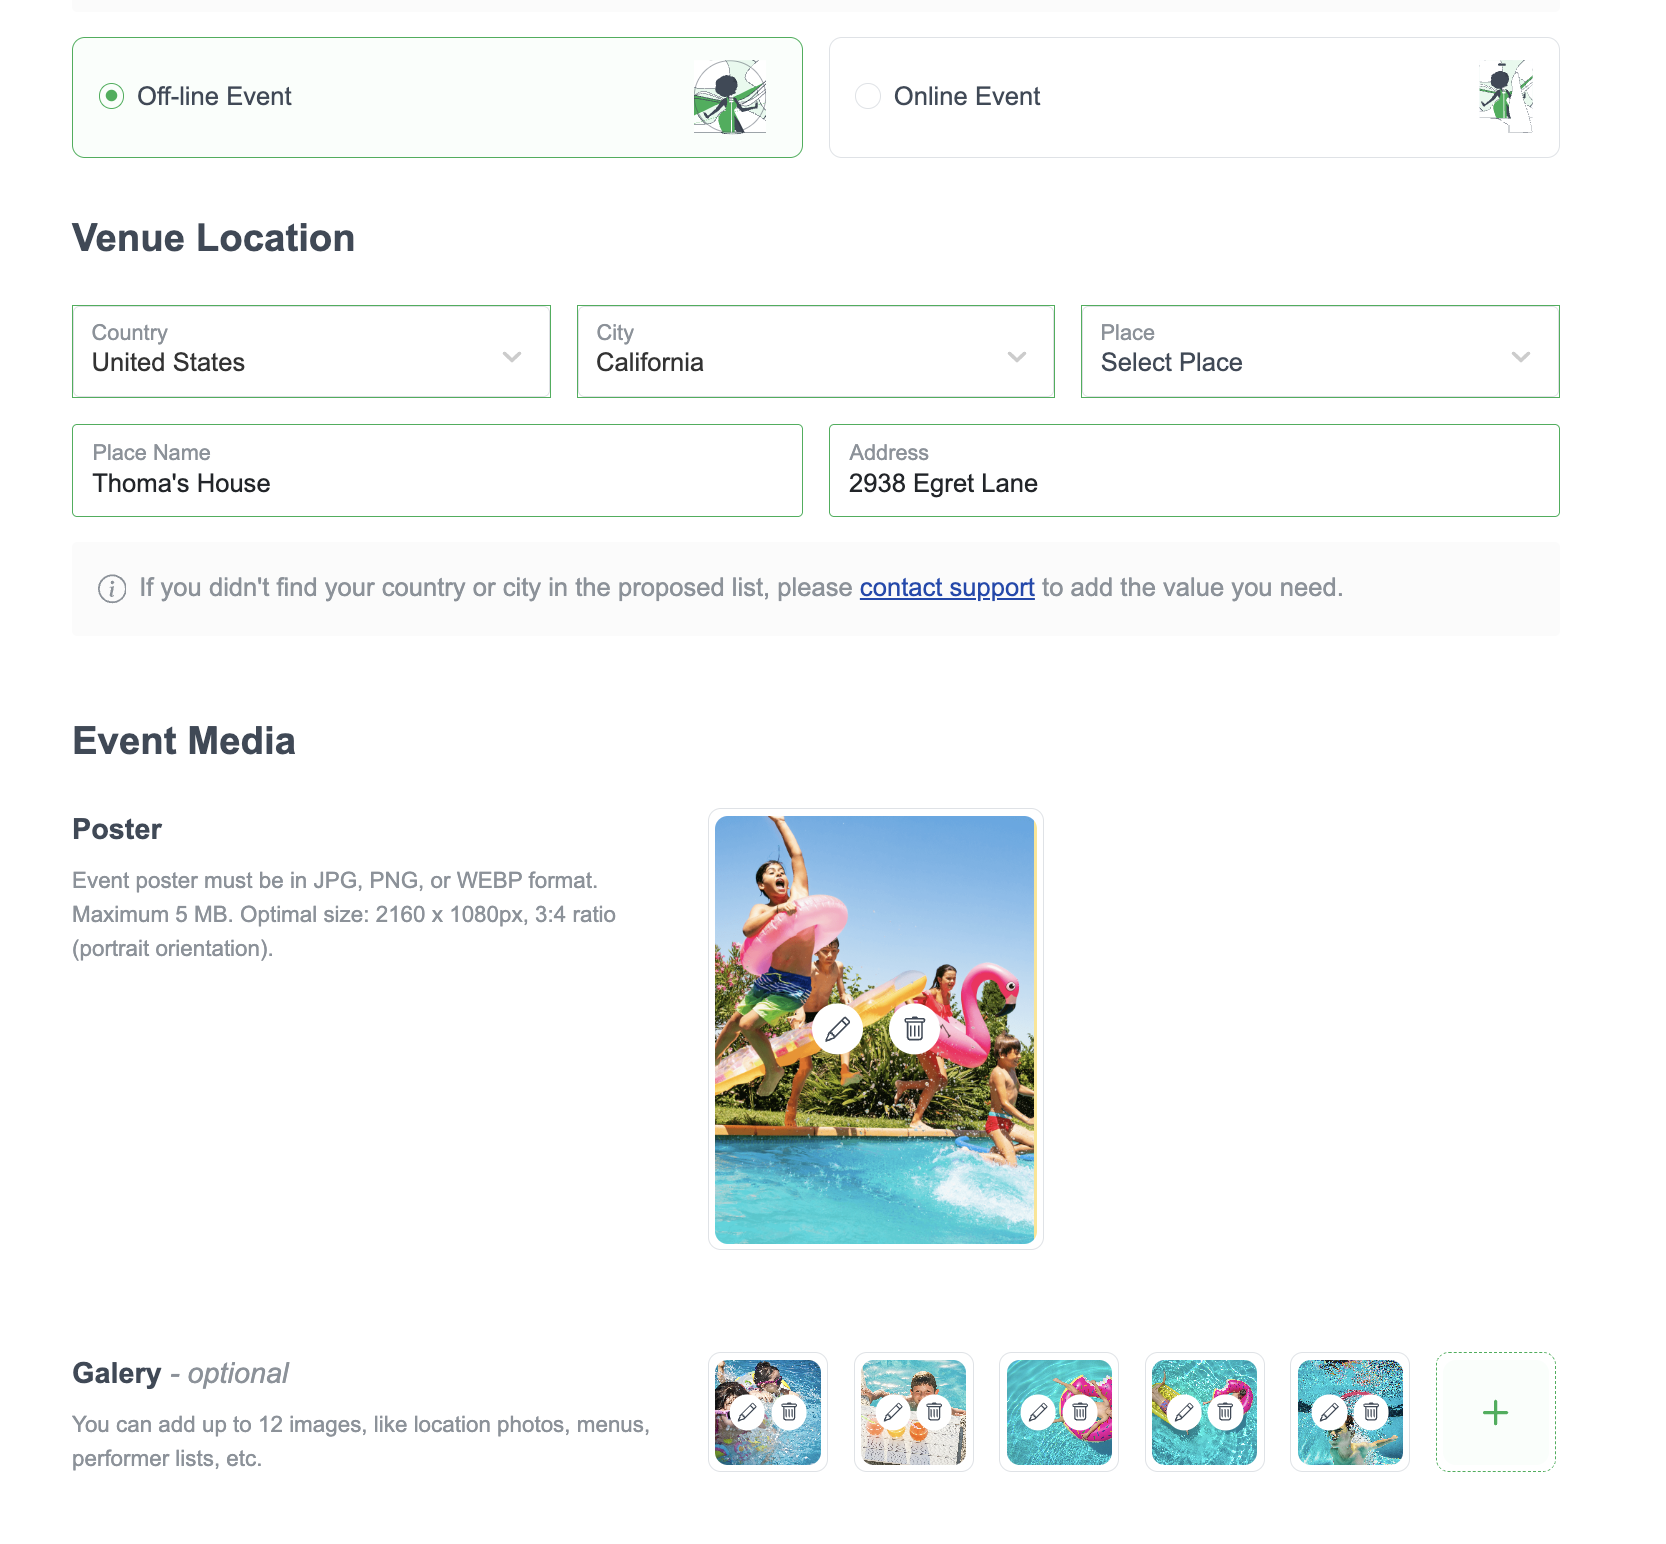
Next, select the event format. Events can be held offline, meaning they take place in person at a physical venue, or online, using platforms like Zoom, YouTube, or similar. For offline events, be sure to provide accurate venue details, including the country, city, and specific place where the event will happen. If your location isn’t listed, you can easily request an addition through the support chat.
Visuals are an important part of your event page. A poster is required and should be no larger than 5MB in JPG, PNG, or WEBP format. For the best presentation, a size of 2160x1080 pixels is recommended. You also have the option to include a gallery of up to 12 images to showcase your event further. If you're a Pro user, you can upload an event banner that will be featured prominently on city or country pages, helping your event stand out to a broader audience.
Step 2: Ticket Details
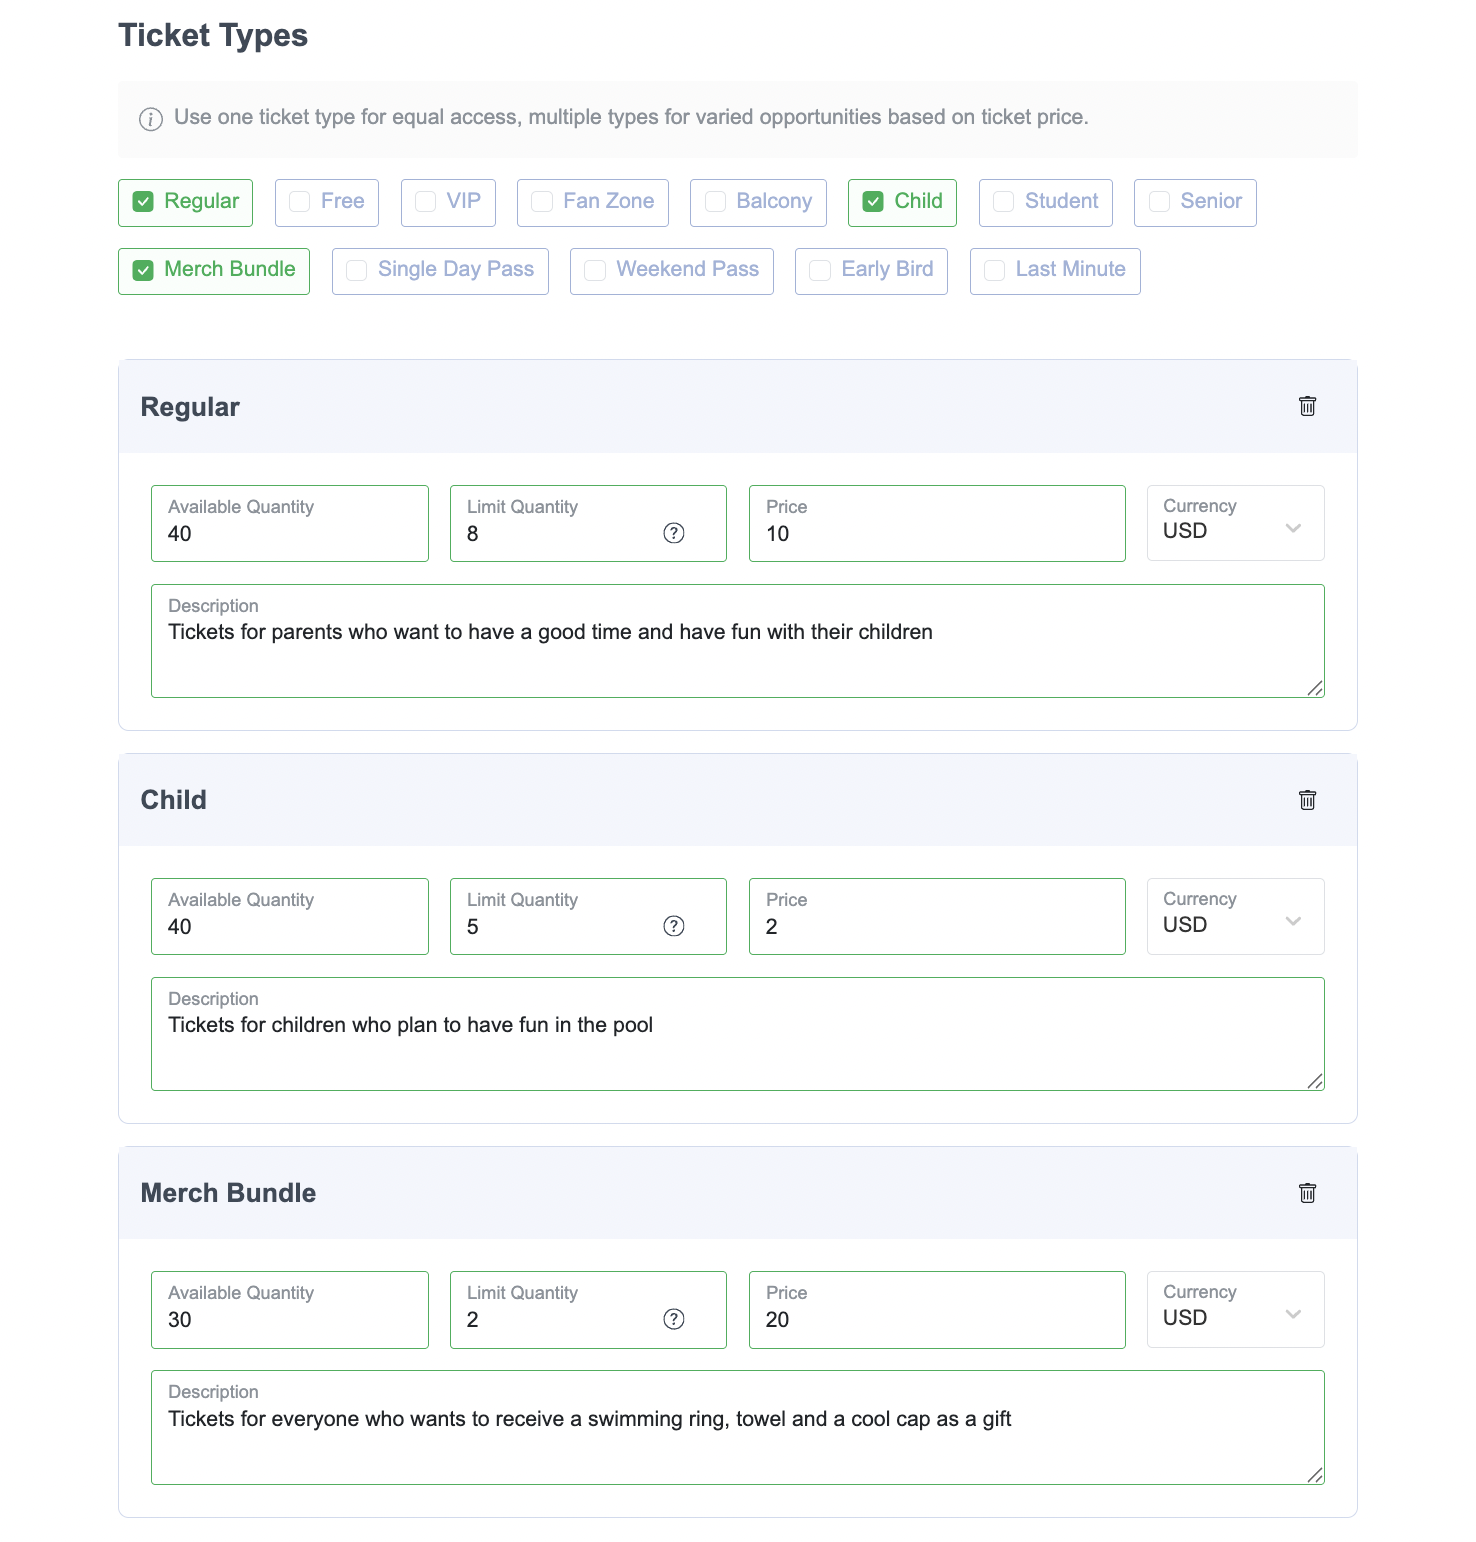
Offer different ticket types to increase engagement and revenue. You can mix and match free, paid, and limited-access passes.
Ticket Type Options:
- Regular – Standard access.
- Free – Complimentary entry (perfect for promo events).
- VIP – Includes exclusive perks (e.g., priority entry, seating).
- Fan Zone – Premium space close to the action.
- Balcony – Upper-level or reserved viewing.
- Child / Student / Senior – Discounted or special-access tickets.
- Merch Bundle – Ticket + merchandise.
- Single Day Pass / Weekend Pass – Perfect for multi-day events.
- Early Bird / Last Minute – Price-based timing strategy.
When creating tickets for your event, it’s important to provide key details for each ticket type. Start by specifying how many tickets are available, so you can control attendance and avoid overselling. You’ll also want to set a purchase limit per buyer to ensure fair access for all attendees. Be sure to include the ticket price along with the currency, so buyers know exactly what to expect. Adding a short description helps clarify what each ticket offers, making it easier for customers to choose the right option.
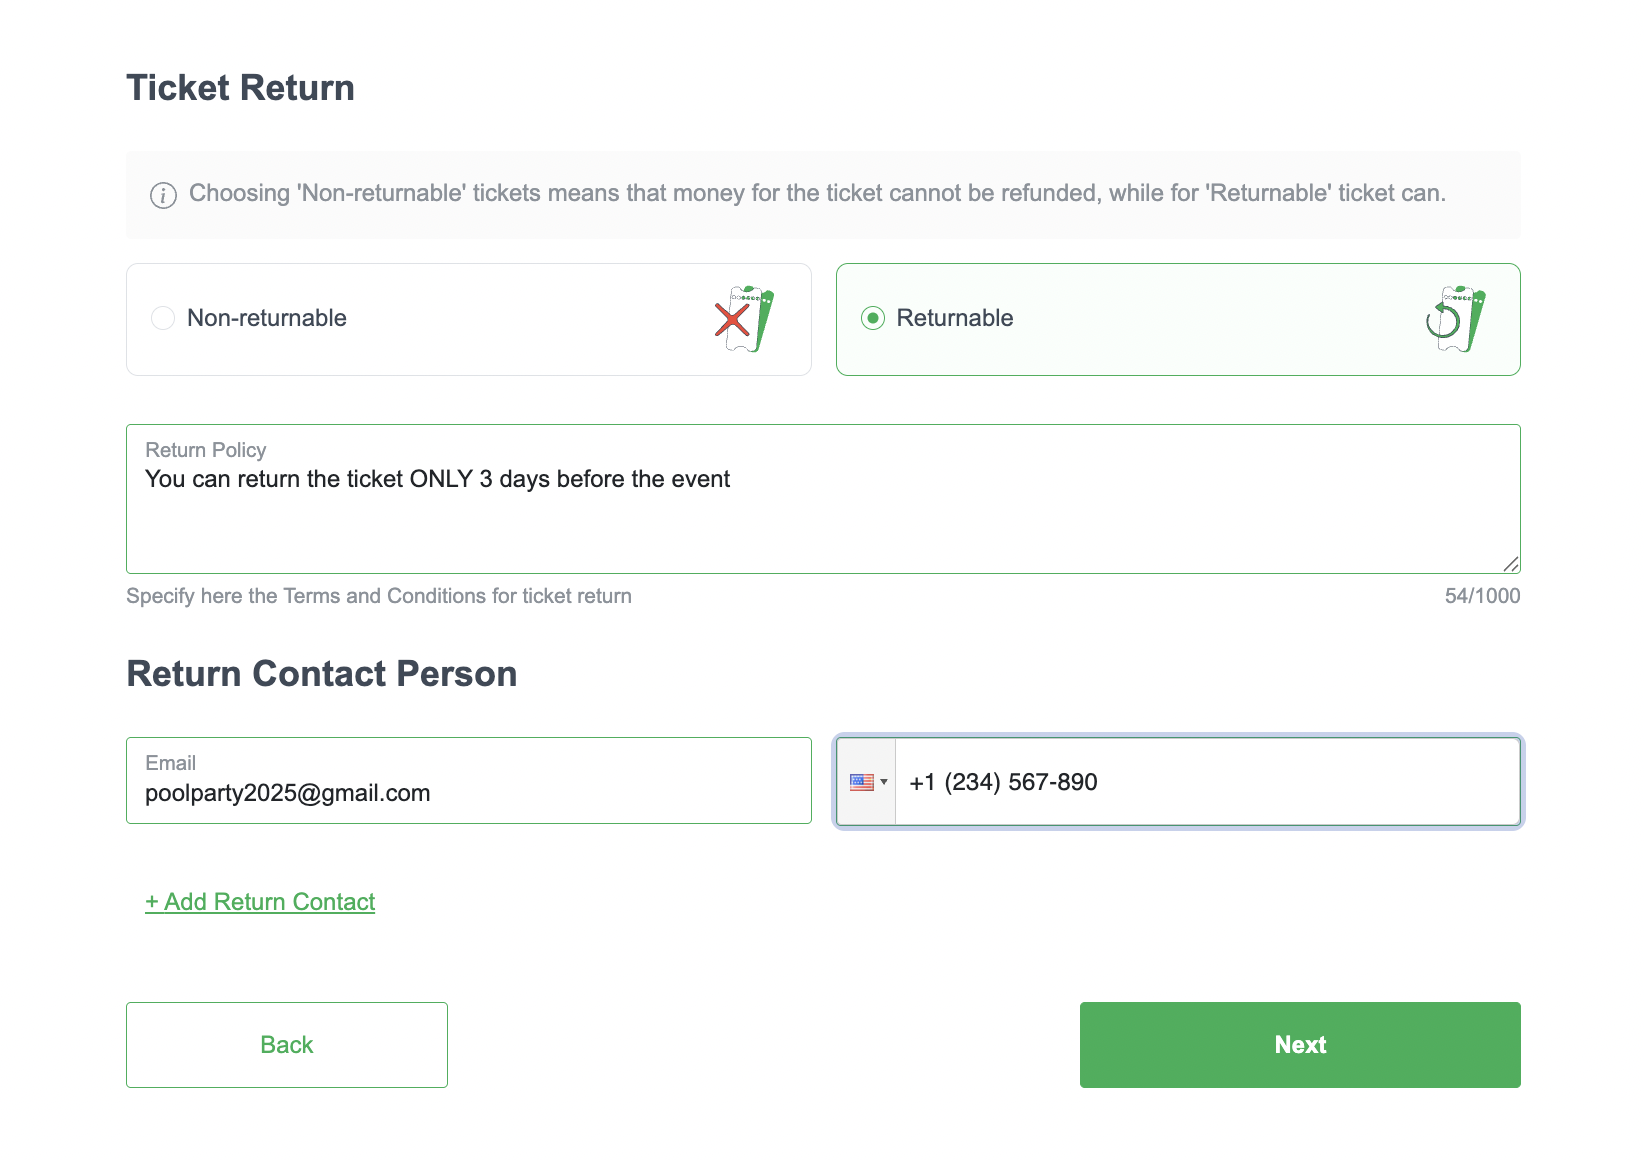
You’ll also need to decide on the ticket return policy. If your tickets are non-returnable, buyers will understand that no refunds are available after purchase. On the other hand, if you allow returns, you should clearly outline the refund policy and provide contact details such as an email address and phone number. This helps build trust and makes it easy for attendees to reach out if they have questions or issues regarding refunds.
Step 3: Payment Information
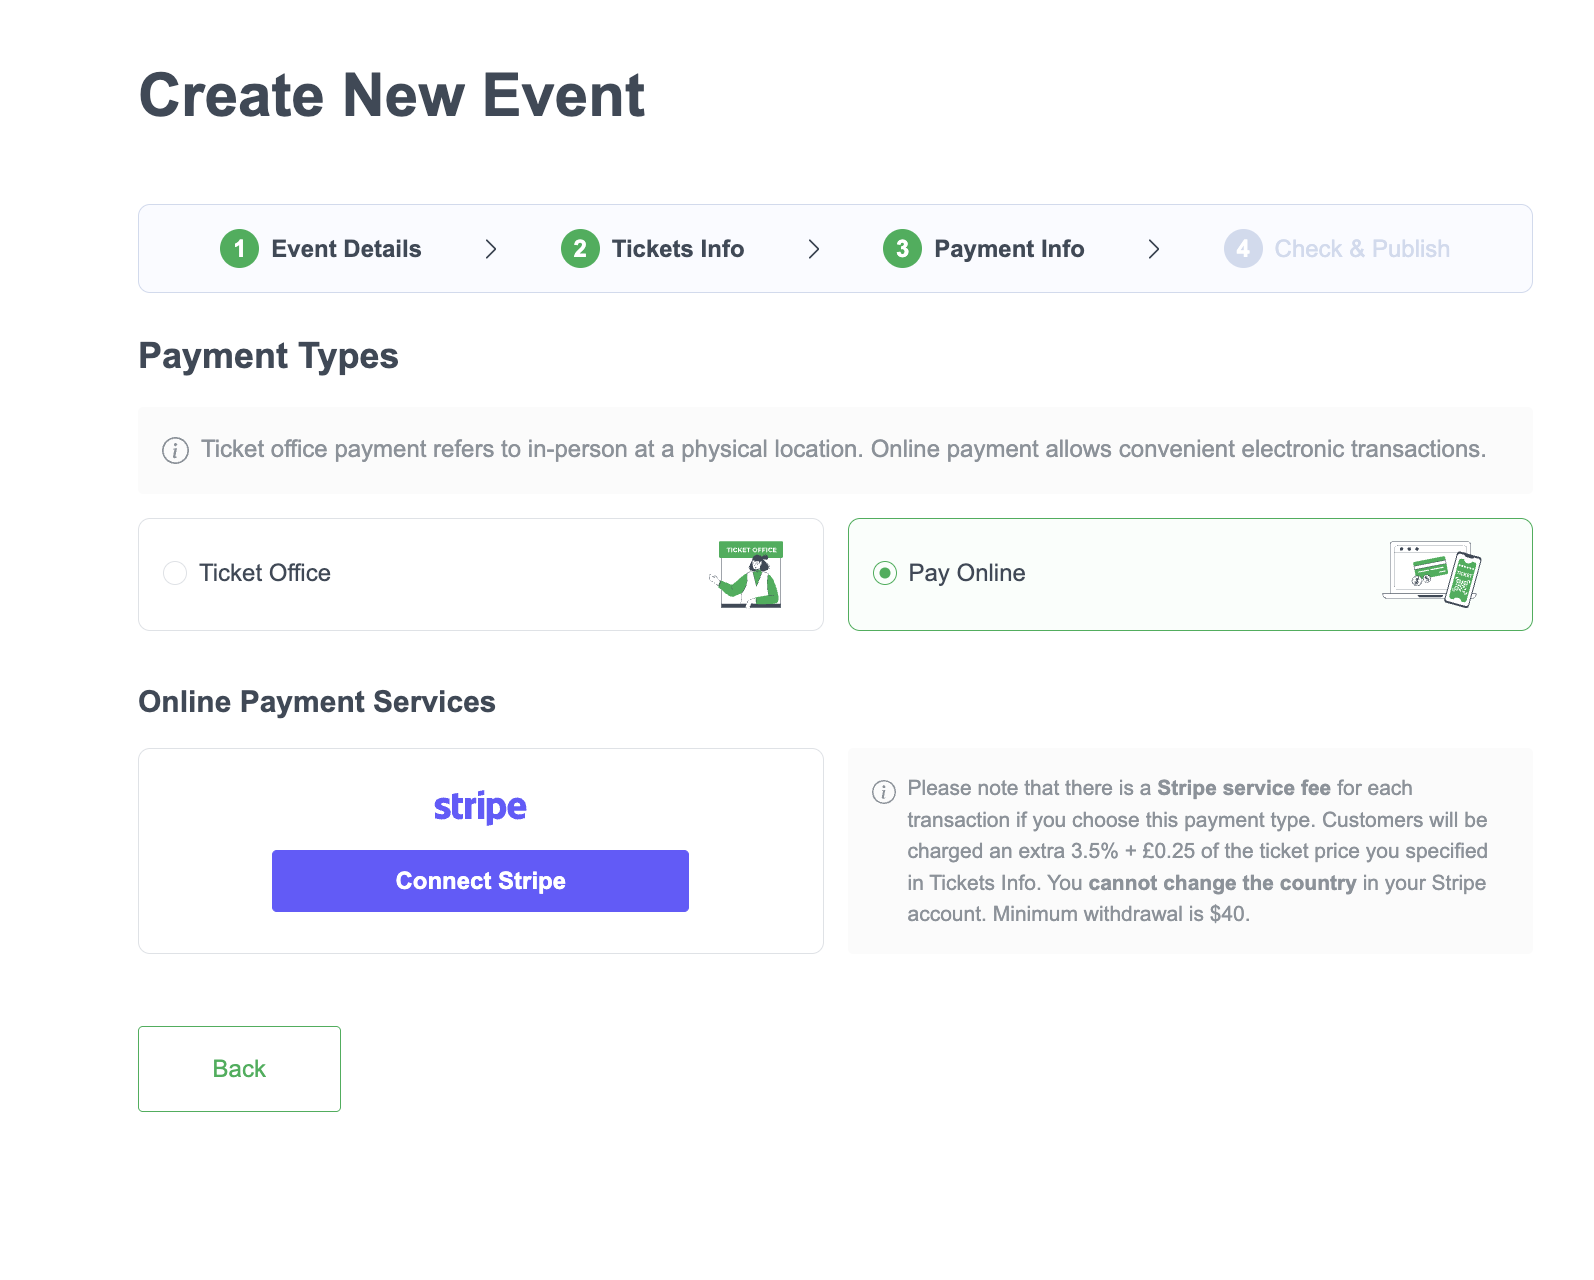
ME-Ticket supports both online and offline payments.
Choose Payment Type:
Online Payments (Stripe)
- Connect your Stripe account to get paid instantly after each sale.
- If Stripe isn’t available in your country, use ME-Ticket’s Stripe — you’ll get your full earnings one week after your event.
? Stripe adds a small fee (2.9% + €0.30), shown at checkout.
If Stripe is not available in your country, you can connect to ME-Team's Stripe account. To do this, just click on the "Alternative" banner.
Please note: this payment method does not imply receiving money for each ticket sold. Organizers will receive the entire proceeds one week after the conclusion of the event
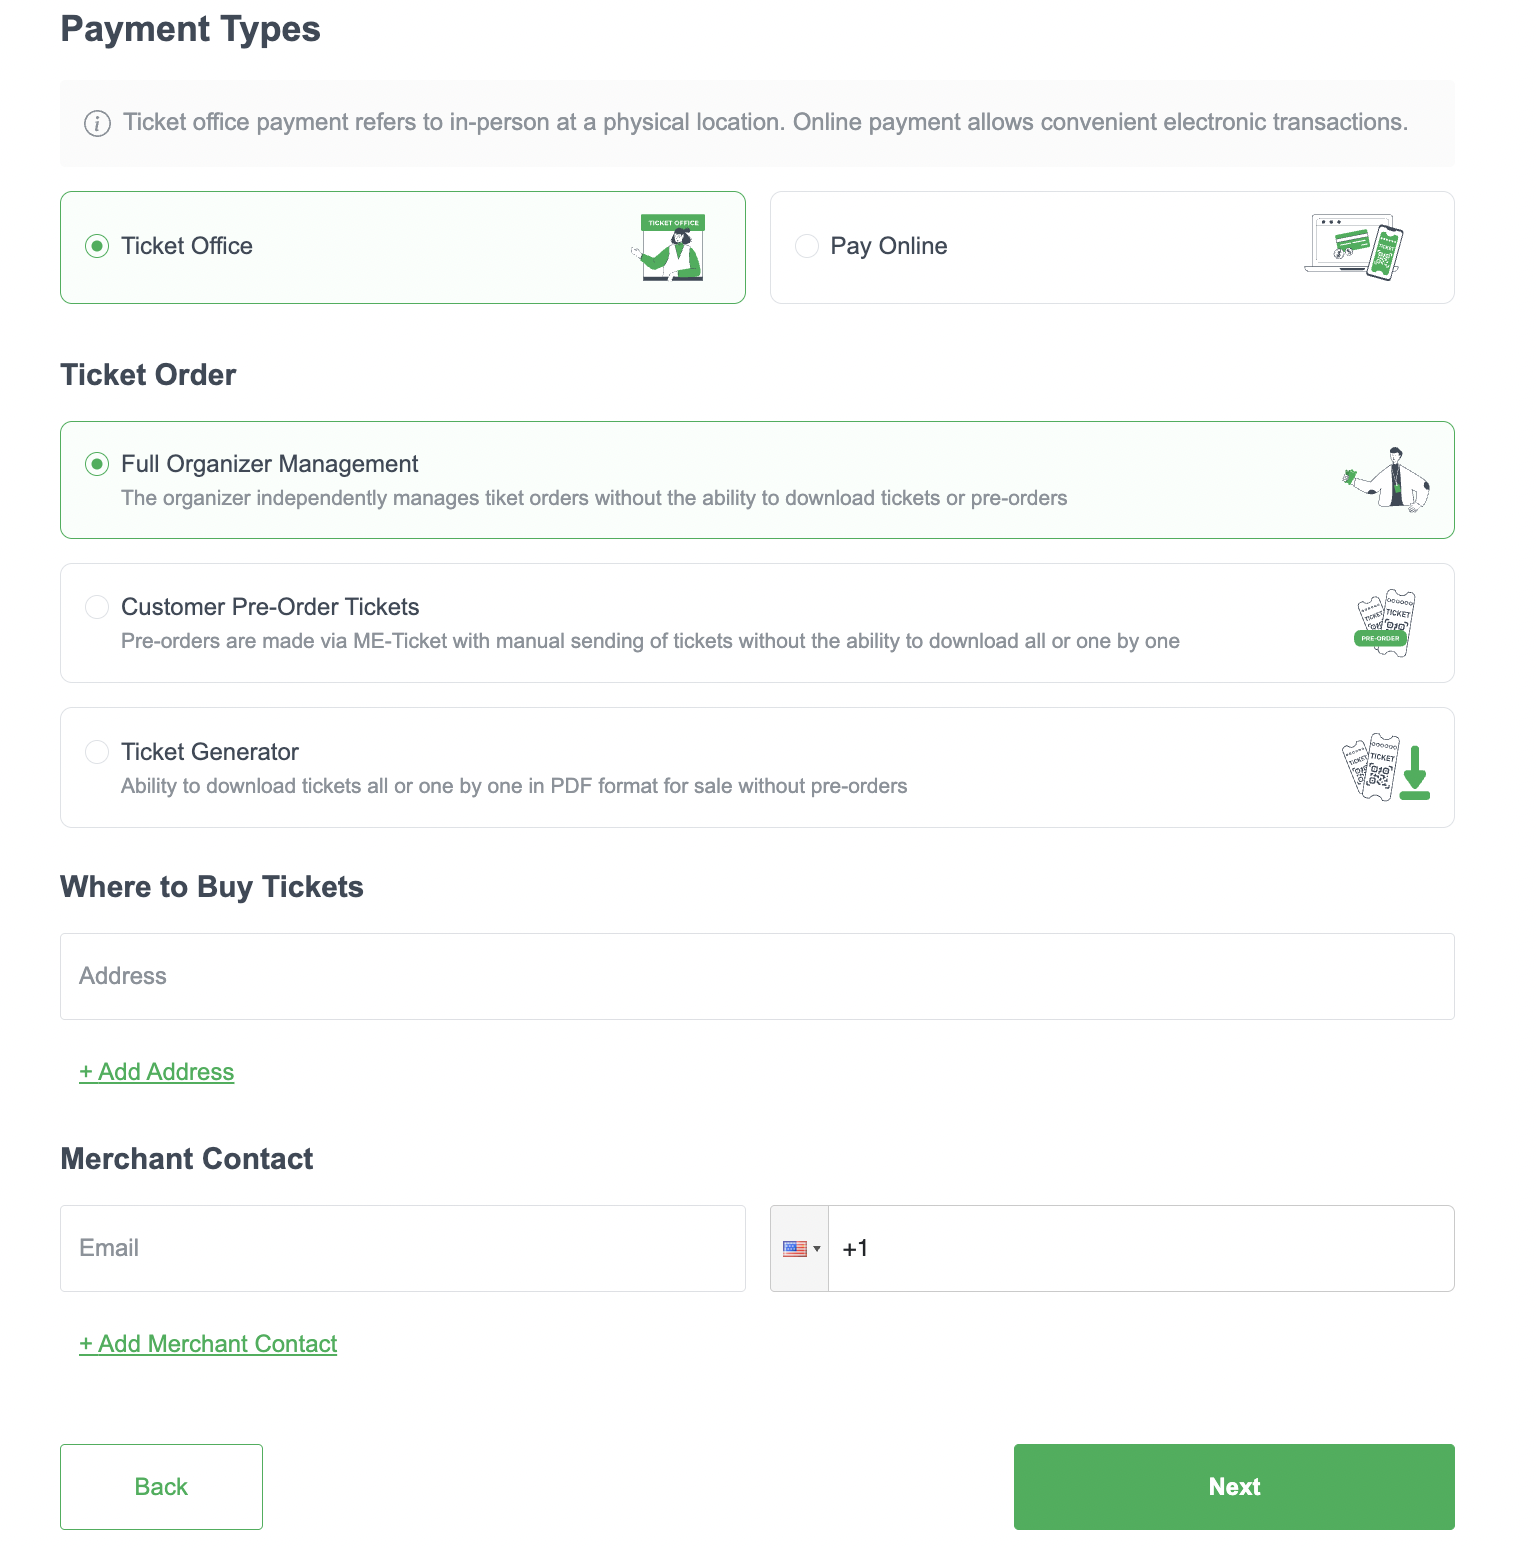
Offline Sales (“Ticket Office”)
Prefer to handle payments in person? Choose this option, and buyers will see your contact info and where to buy tickets.
Note: No QR codes or sales tracking with this method.
That’s it! ME-Ticket handles the rest — from payment processing to ticket delivery.
Ticket Order:
- Full Organizer Management The organizer independently manages tiket orders without the ability to download tickets or pre-orders
- Customer Pre-Order Tickets Pre-orders are made via ME-Ticket with manual sending of tickets without the ability to download all or one by one
- Ticket Generator (only for Pro) Ability to download tickets all or one by one in PDF format for sale without pre-orders
If Offline:
- Add your ticket selling address
- Organizer email & phone
? Don’t forget to enter bank info if using Stripe! If Stripe isn’t available in your country, ME-Ticket offers an Alternative payout method after your event concludes.
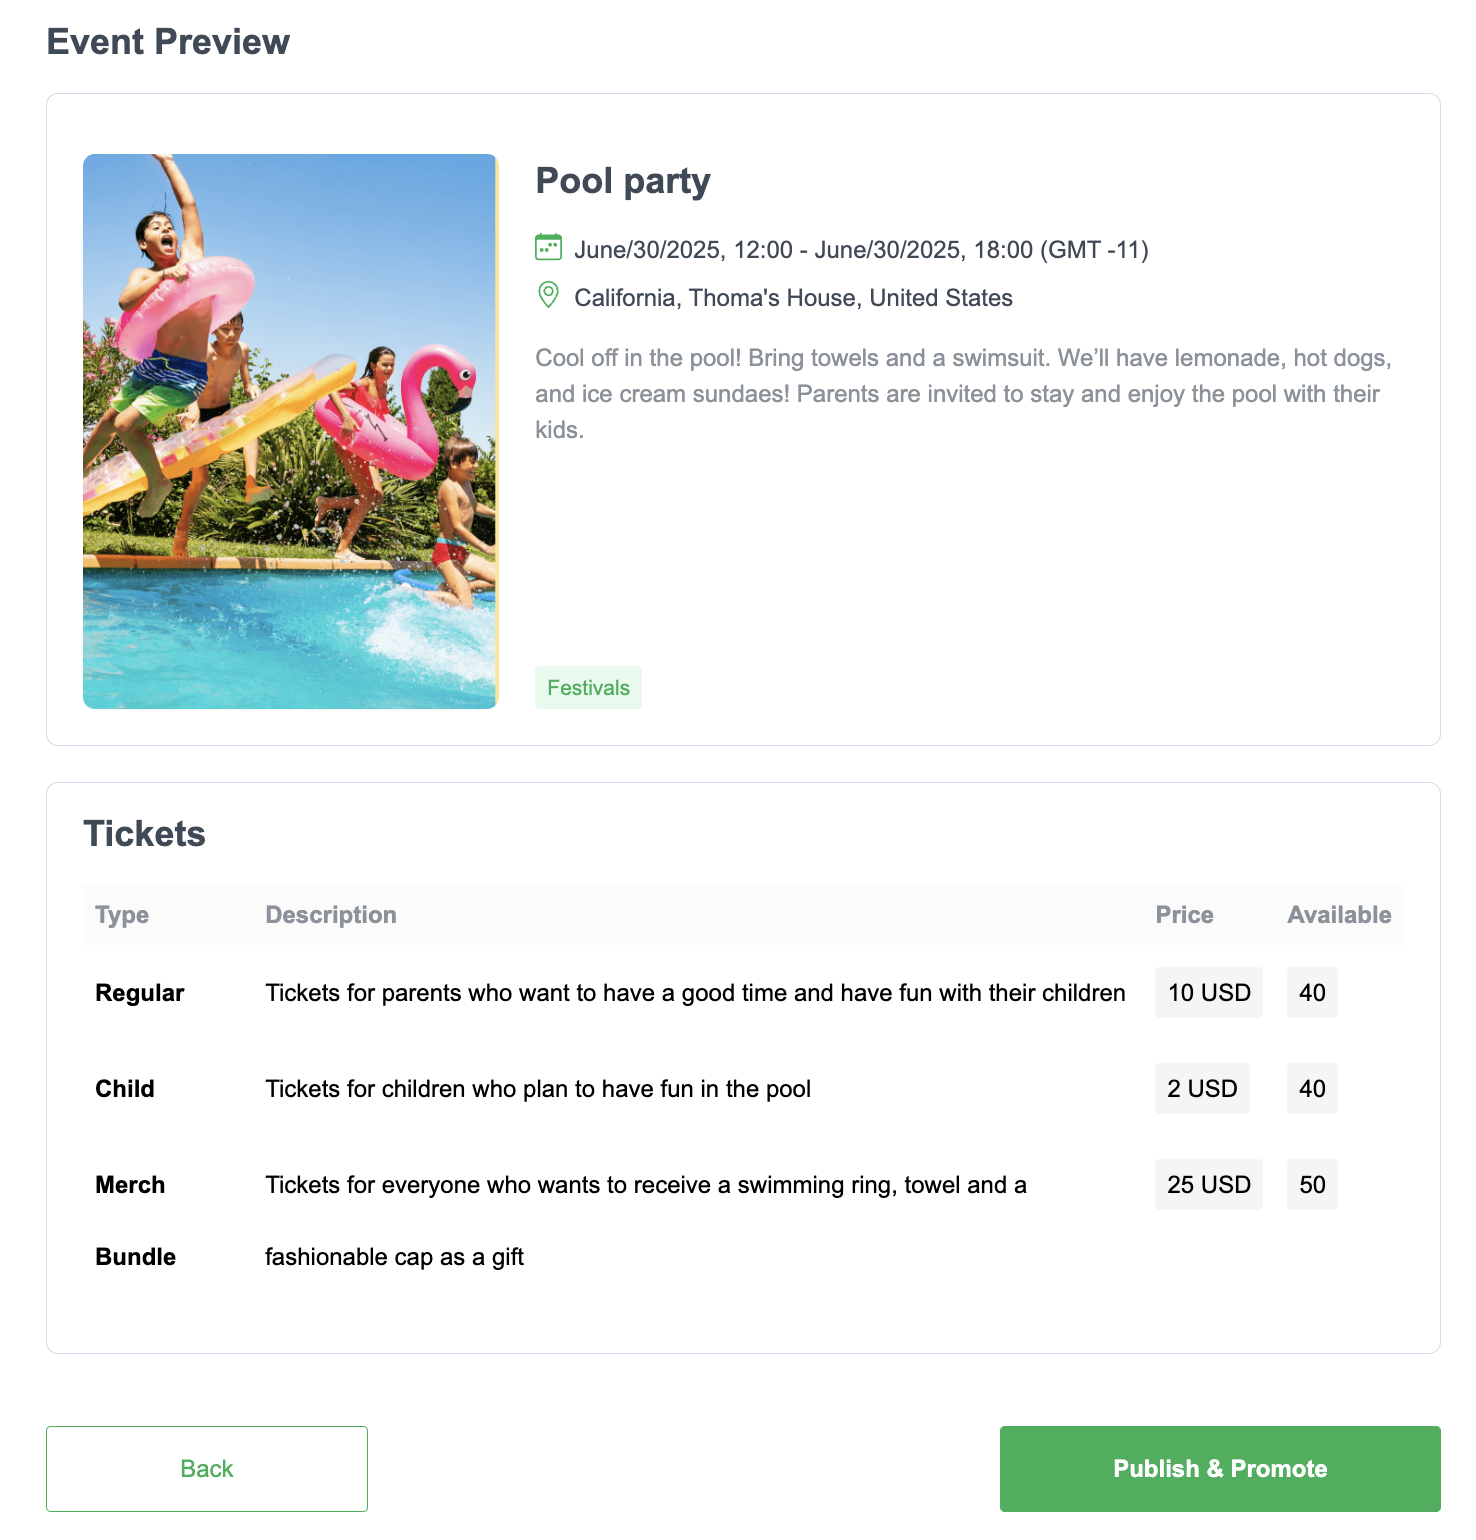
Step 4: Review & Publish
You're almost there! Final checks before going live:
- Event Preview – Double-check title, performers, and ticket types.
- Ticket Summary – Review pricing and return options.
- Hit “Publish & Promote” – Your event is now live!
Share it via social media, email, or let ME-Ticket highlight your event on its homepage (with Pro plan).
Pro Tips for a Successful First Event
Launching is just the beginning! Here are a few quick tips to boost your success:
- Promote early and often – Create FOMO and build hype.
- Use countdowns – Urgency drives action.
- Collect email addresses – Great for follow-up events.
- Keep your page updated – Add guest reveals, schedule changes, or bonus content.
- Engage with your audience – Answer questions, reply to comments, and thank early buyers.
And remember, ME-Ticket has a real support team if you get stuck or have questions along the way.
Conclusion
Starting your first event might feel overwhelming — but with ME-Ticket, it’s totally doable in under an hour.
From the moment you hit “publish,” you’ll be in full control of your ticket sales, your guest list, and your event experience. So what are you waiting for?
Head over to ME-Ticket, create your account, and launch your first event today. Your audience is waiting!